Pipe drawing and editing is rewritten in this chapter. General methods for both pipes and ventilation are handled here, so it is strongly recommended for those creating ventilation models to study this chapter.
A pipe section consists of 3 main parts. This is pipeStart, the pipe itself with it's associated components (bend, tee, reducer, valve, filter, etc.) and pipeEnd. It is the information in pipeStart that decides the properties for the rest of the pipe (medium, dimension, material). These are properties that will continue until a possible reducer or another component influence on the pipe section.
There are several ways of starting a pipe. Usually the pipeStart is connected to a DDS object (other pipes, other storeys) ,but it is also possible to start a pipe in a free point in the drawing.
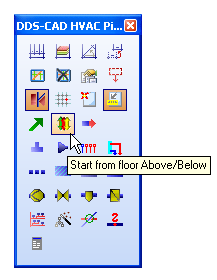
Before starting the pipe drawing, select tool for pipe drawing
Tools for pipe drawing.
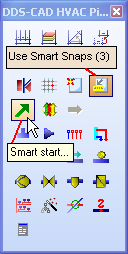
The DDS SmartStart concept will search actively in the drawing for connection objects when you start a pipe. If DDS finds an object, it will be indicated in the drawing, and you can connect a pipe by clicking on it.
|
Start SmartStart function from the toolbox to the left. If Smart snapping is active, DDS will search for known objects to connect to. If you turn off Smart snapping the pipe is started freely, and you must indicate medium, dimension, start height and direction. Smart snapping is also turned off if you hold down the Alt key on your keyboard. |
|
|
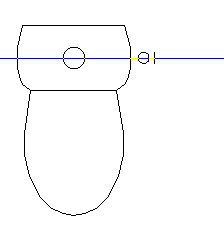
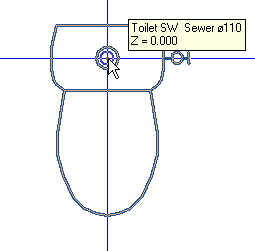
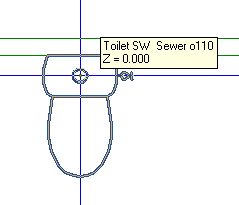
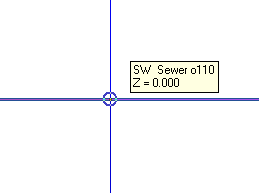
| Toilet positioned in drawing | Toilet indicating that SmartStart has found a connection point. This connection point is displayed in the yellow box. The absolute X,Y and Z co-ordinates for the point is also displayed |
If you choose to start a pipe without connection to known DDS-CAD objects, a dialog box with properties for the pipe will be displayed. Here you must select medium, dimension, material, starting height and fall (if you draw a sewer pipe).
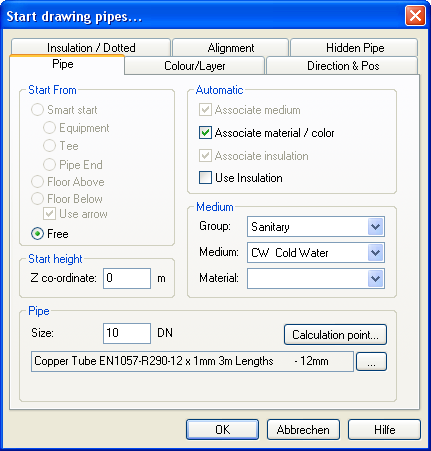
Pipe properties.
If DDS does not find any object to connect, the user must enter the properties for the pipe. The most important properties are:
Start height: Height in meter above finished floor to centre pipe. If this pipe is to be drawn beneath the finished floor, set the start height to negative value (for instance -1 m)
Medium: Group, Medium and Material are selected from the menu
Size: Entered in mm after you have selected the medium.
Press the OK button to start the pipe defining.

Click to see a video
If you want to lock the start direction, start position or define fall, do this in the tab ”Direction & pos” before you start drawing the pipe.
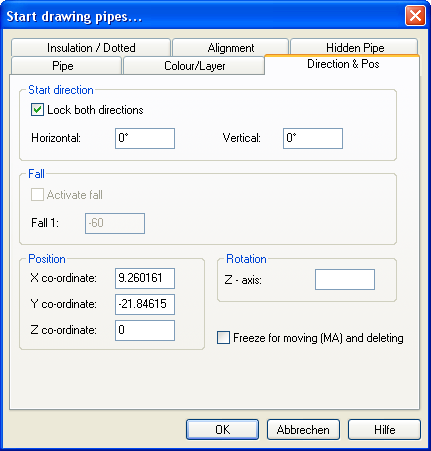
Start direction, fall and start position.
Start direction: Press ”Lock both directions” to activate this function. The direction has been entered in degrees, from 0 to 360. In Horizontal direction, 0 degrees is positive X direction, 90 degrees is positive Y direction, 180 degrees is negative X direction and 270 degrees is negative Y direction.
In Vertical direction, 90 degrees is straight upwards in the room, while -90 is straight downwards in the room.
Fall: Can only be activated if you have selected sewer pipes. Entered in 1 height meter in proportion to entered length meter. If the fall is downwards, set a minus sign in front of the fall value. For instance, if you start a sewer pipe in a house, and draw the pipe out of the house, the fall is to be downwards, and the values must be negative. If you start outside the house and draw inwards, the fall must be upwards, and the value must be positive.
Position: Absolute start co-ordinates for the pipe. To be entered in meter.
If you lock the vertical direction either upwards or downwards, DDS-CAD will ask for a new height. You can then enter Absolute height to enter new route height for the pipe.
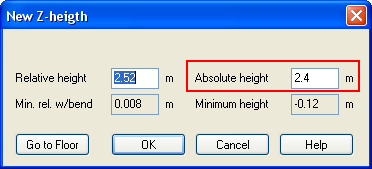
Absolute height is always in proportion to the floor in the storey you are working in - in meters
Example: If you start a sewer pipe on floor ( Z=0 meter), go directly to 3.1 meter above floor and then horizontally above ceiling.
Click to see a video
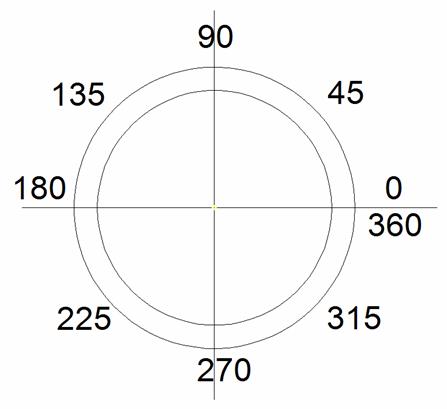
Horizontal direction. The degree value can be locked before you start drawing pipes.
DDS-CAD SmartStart will search for a connection point from which you can start the pipe. The following connection point will be available:
|
|
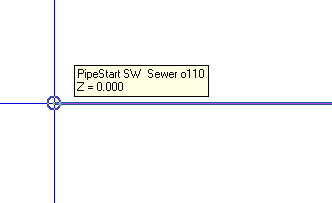
| From object. Be aware, that if the object has a output direction straight down or straight up, DDS-CAD will ask for a new height directly | From pipeStart, if this of the type Free. |
|
|
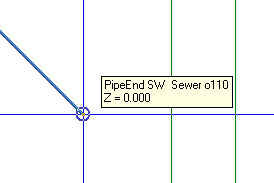
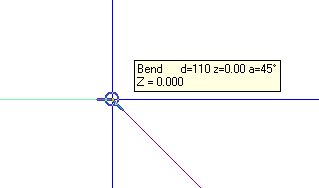
| From pipeEnd, if this is of the type Free | From pipe Bend, a tee will automatically replace the bend |
|
|
| From pipe Segment. A tee will be inserted | From pipe Tee. |
From the first floor. One or several pipes must be finished with riser to one of the nearest storeys.
If you start from a DDS object, the output direction from the object may be locked. This will depend on the object you start from.
If the object has several connection points, you will get a list of the different connection points.
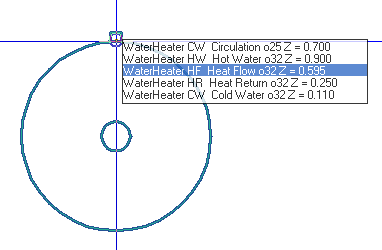
Several connection points close to each other. A list of the points is displayed, and you must select from which point you want to start.
The list displays the absolute X, Y and Z co-ordinates, medium and dimension for the connection points. In addition you can see if the output direction is locked. In the example above, the vertical direction is locked to 90, indicating that the pipe is to go straight upwards from the object. When the vertical direction is locked, you will be asked which height you want before going horizontally with the pipe.
Absolute height is always the height in proportion to finished floor level. Relative height is the difference between start height (min height) and the new absolute height.
If a pipe in an adjoining floor has been ended with a riser, we have a separate function for connection in the toolbox.
|
|
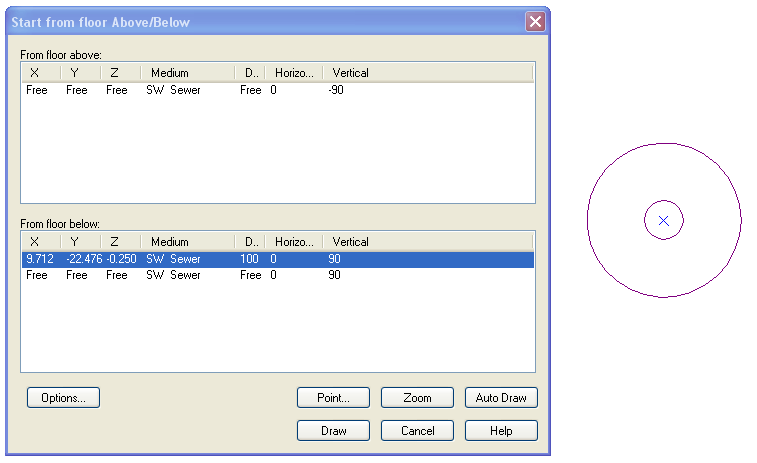
Start pipe from first floor. It is important that the ghost files (DWG architectural files) are precisely above each other, and that the storey height is correct. When you have selected Start pipe from the first floor, a list of all pipes/ducts having been ended in the current floor will be displayed. All risers will display a circle in your model, indicating where the pipe/duct is positioned. By clicking on one of the risers in the list, a little blue cross will be displayed in the current circle. Storey numbering must also be correct for this to function. |
For many risers the function buttons ”Point” and ”Zoom” will be useful – to locate each single riser.
To connect a start to an existing pipe, DDS-CAD will insert a tee. The output direction for this tee is decided by the user. There are four main directions: Up (towards the ceiling), down (towards the floor), left and right. The directions left and right depend on which direction you have drawn the pipe. If you are uncertain of the drawing direction, you will still see the output of the tee when you change side in the tee dialog box.
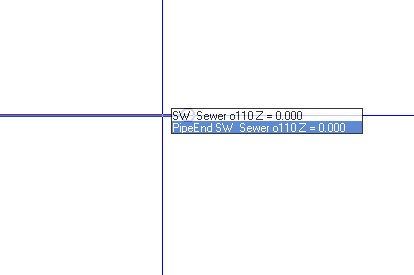
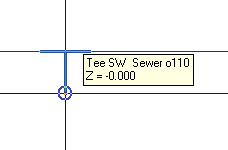
When a tee with an angle other than 90 degrees is to be connected to another pipe, the drawing direction is significant. In the image above the SmartStart function is activated, and the cursor is positioned above a sewer pipe. Note the snap circles. One by each pipe end, and on in cursor position.
When you use SmartStart in a pipe section, you must insert a tee to connect to the pipe section. By clicking the left mouse button, a dialog with the tee properties will appear.
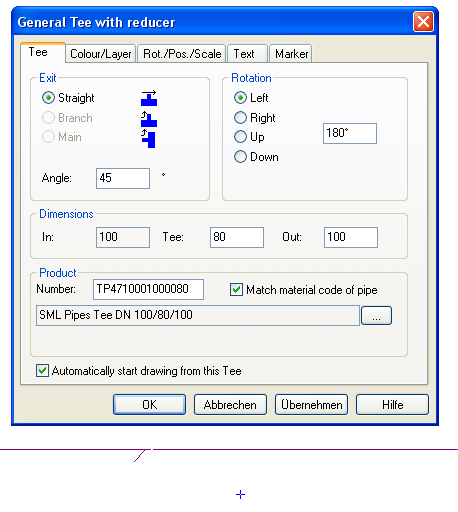
Output direction from a tee depends on in which direction the existing pipe has been drawn. In the example above, rotation has been set to the right, and the angle to 45 degrees. The dimension out of the tee is 80 mm, while the existing pipe has 110 mm.

The example above shows that Rotation and Angle depend on the drawing direction of existing pipes. To get a 45 degree tee where the starting direction points towards the drawing direction for existing pipes, the degrees must be set to 45 + 90 = 135 degrees.
SmartStart will automatically insert tees for all pipes, except for pipe in pipe and underfloor heating pipes.
< Previous Chapter - Next Section >